Week 22: Tessellations – Paper Method


This week we will do tessellations that fit together through translation (moving without rotation). We will look at reflection and rotation in other weeks. There are a few different ways to do this, but we will use the paper method today. I always start the class by talking about what different kinds of shapes can tessellate (triangles, trapezoids, hexagons, rectangles, etc.). We look at the tessellations around us (bricks, floor tiles, fabrics, etc.)
If you have never made a tessellation before, the easiest way is to use a rectangle sheet of paper, with a pencil, scissors and tape. Here are the instructions:
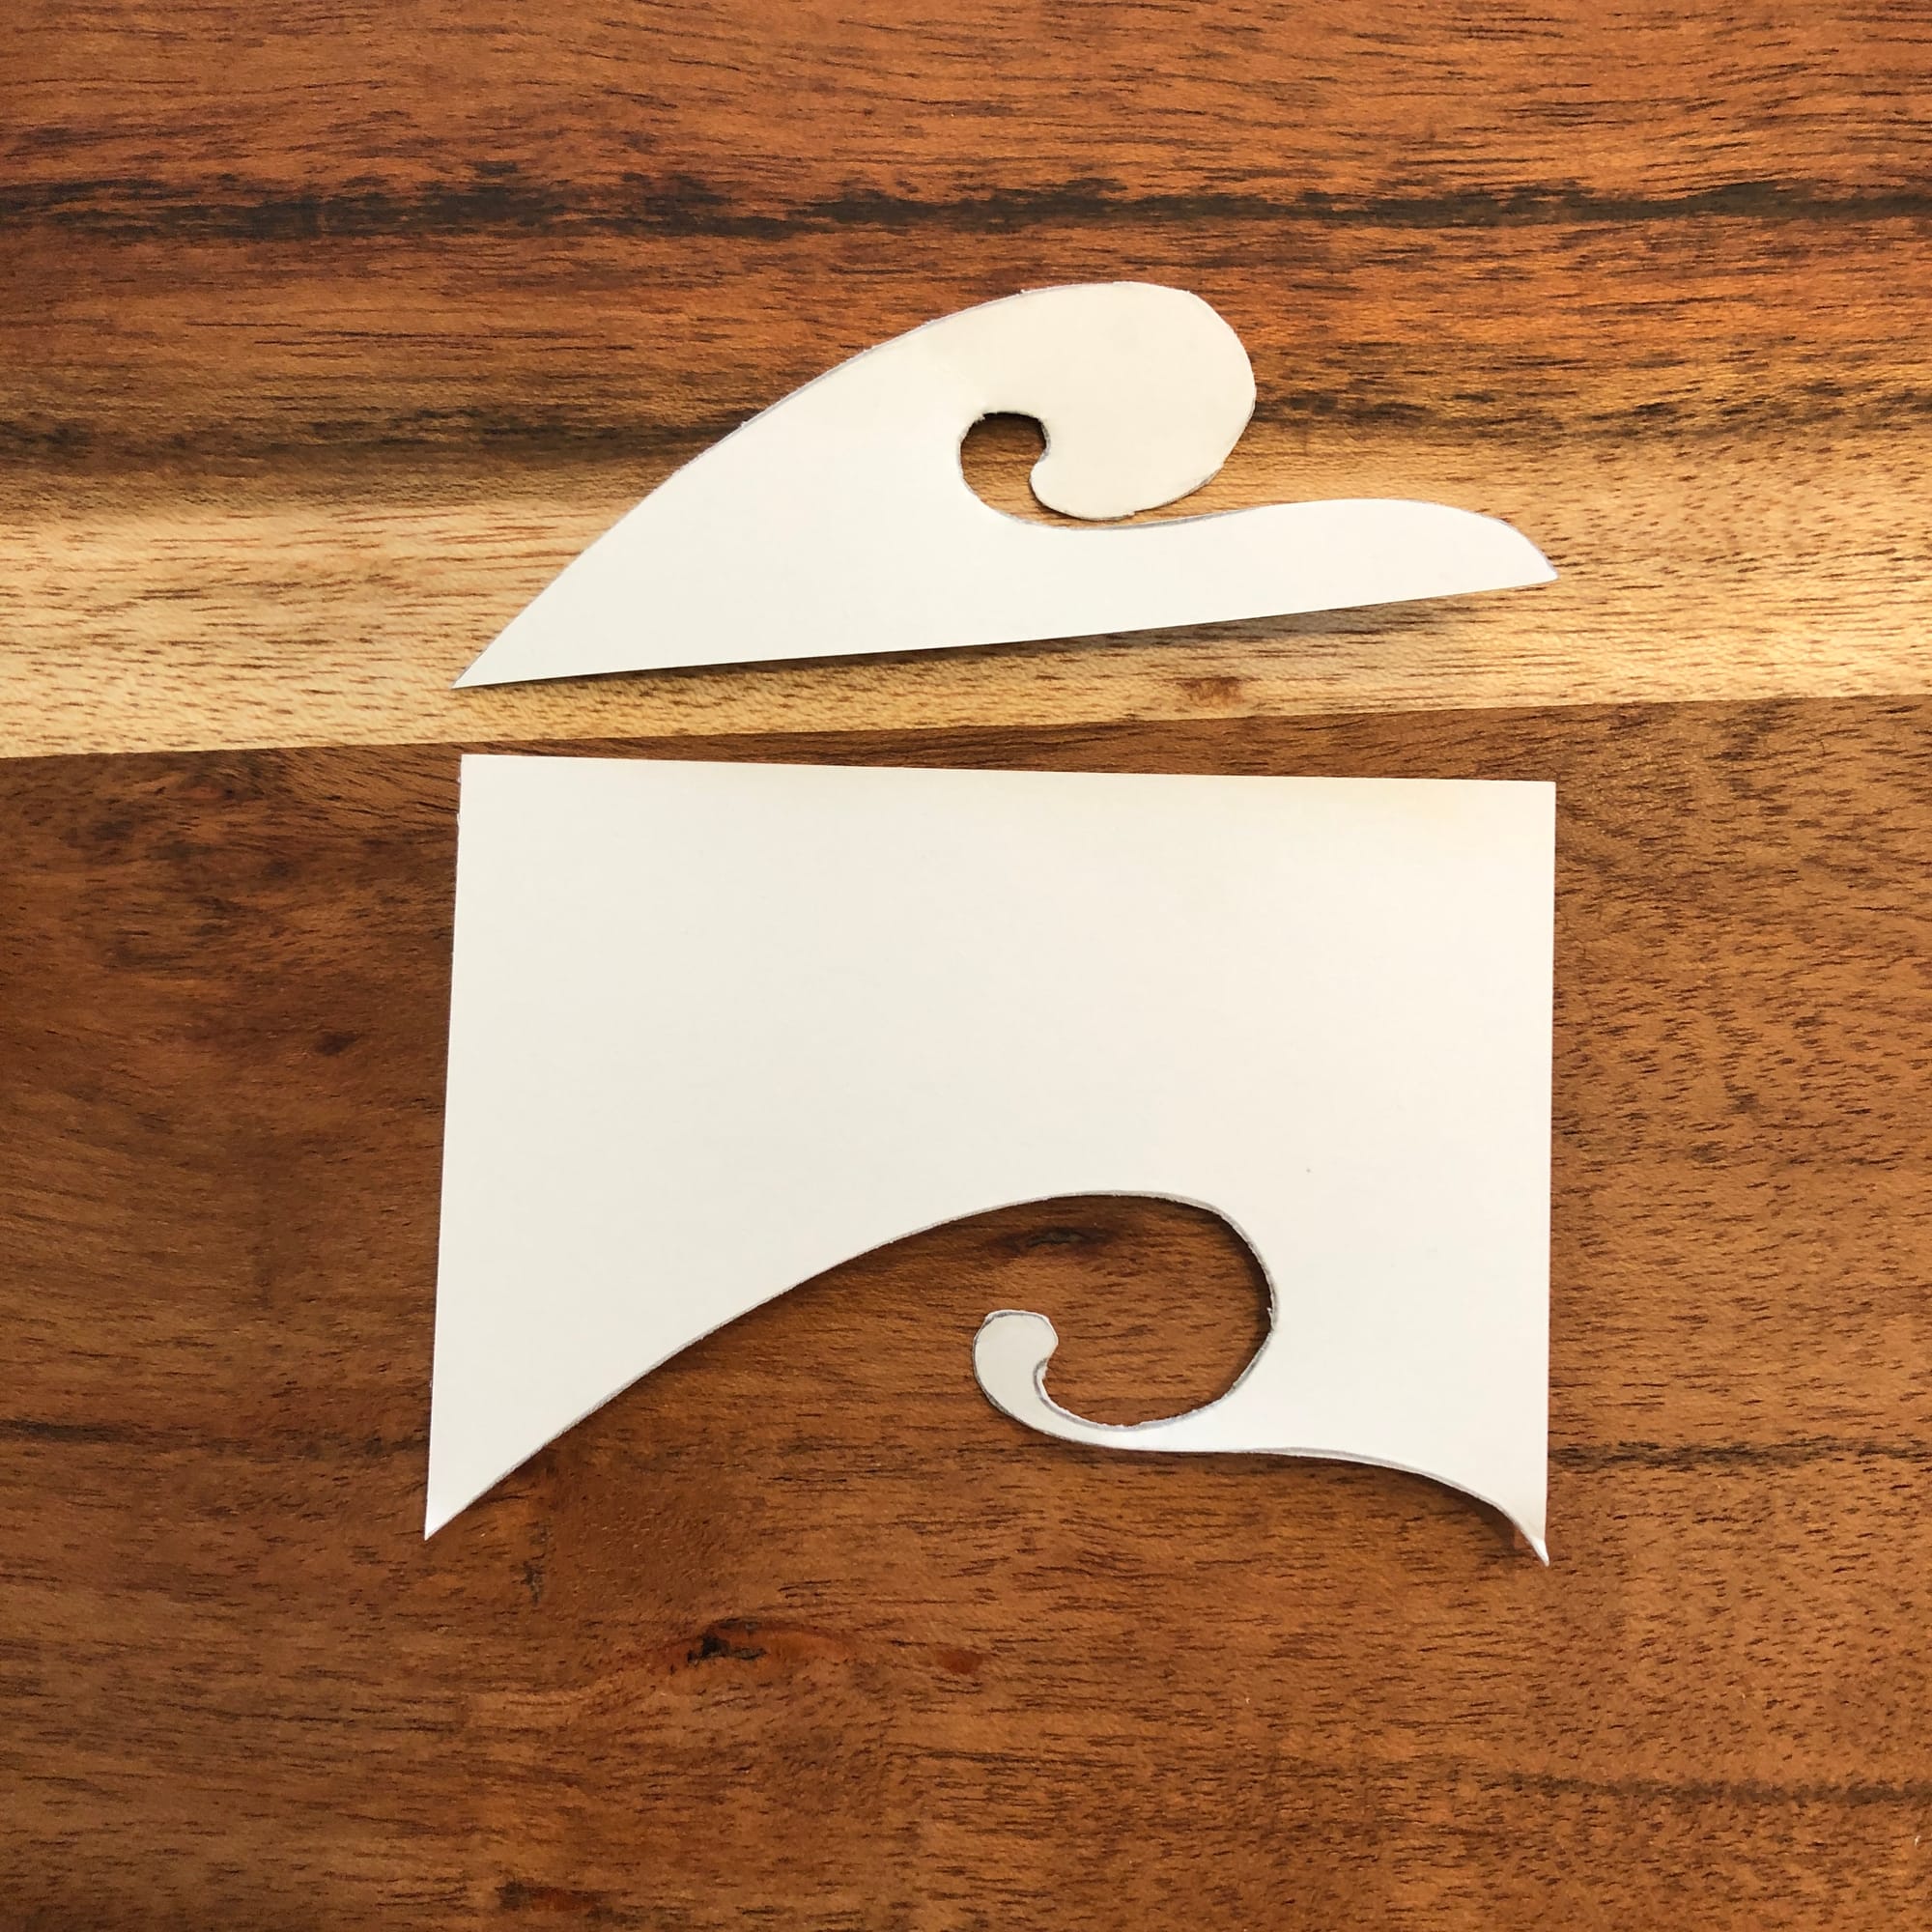
- Step 1: Sketch a curve that stretches from the bottom left to the bottom right corner of your rectangle

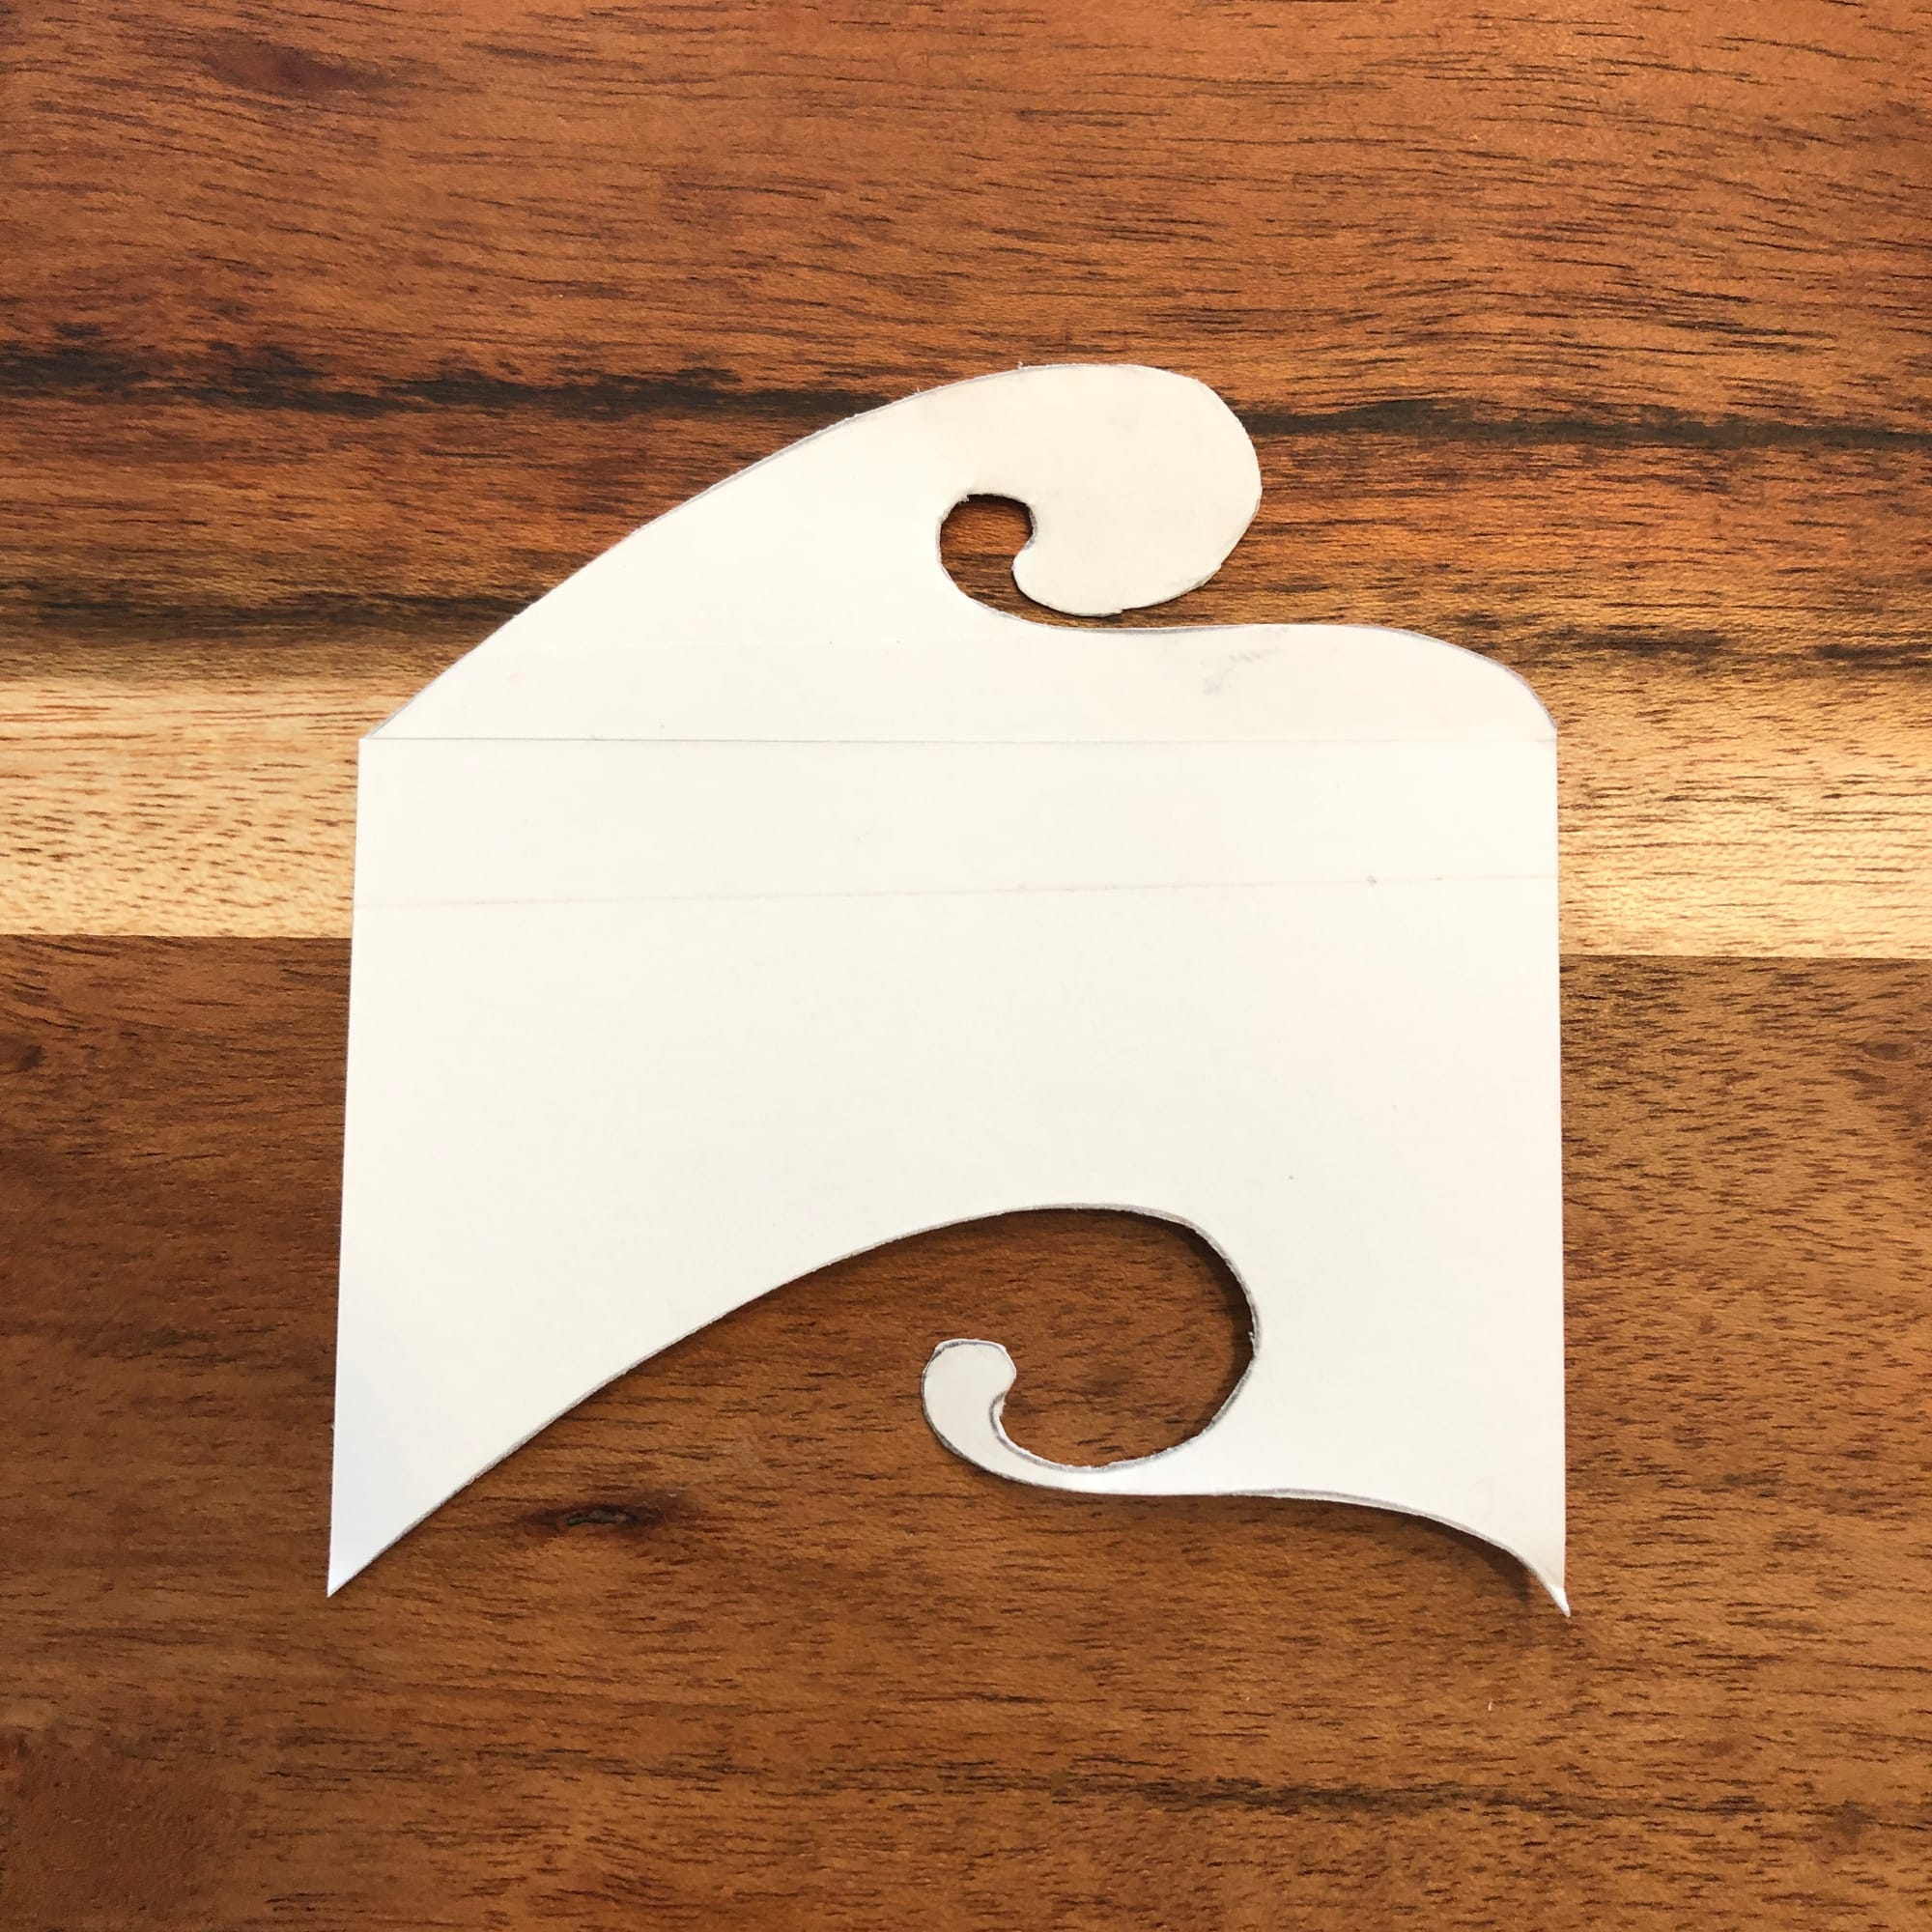
- Step 2: Cut out your curve and move it to the opposite side of your rectangle. Tape it together as perfectly as you can.


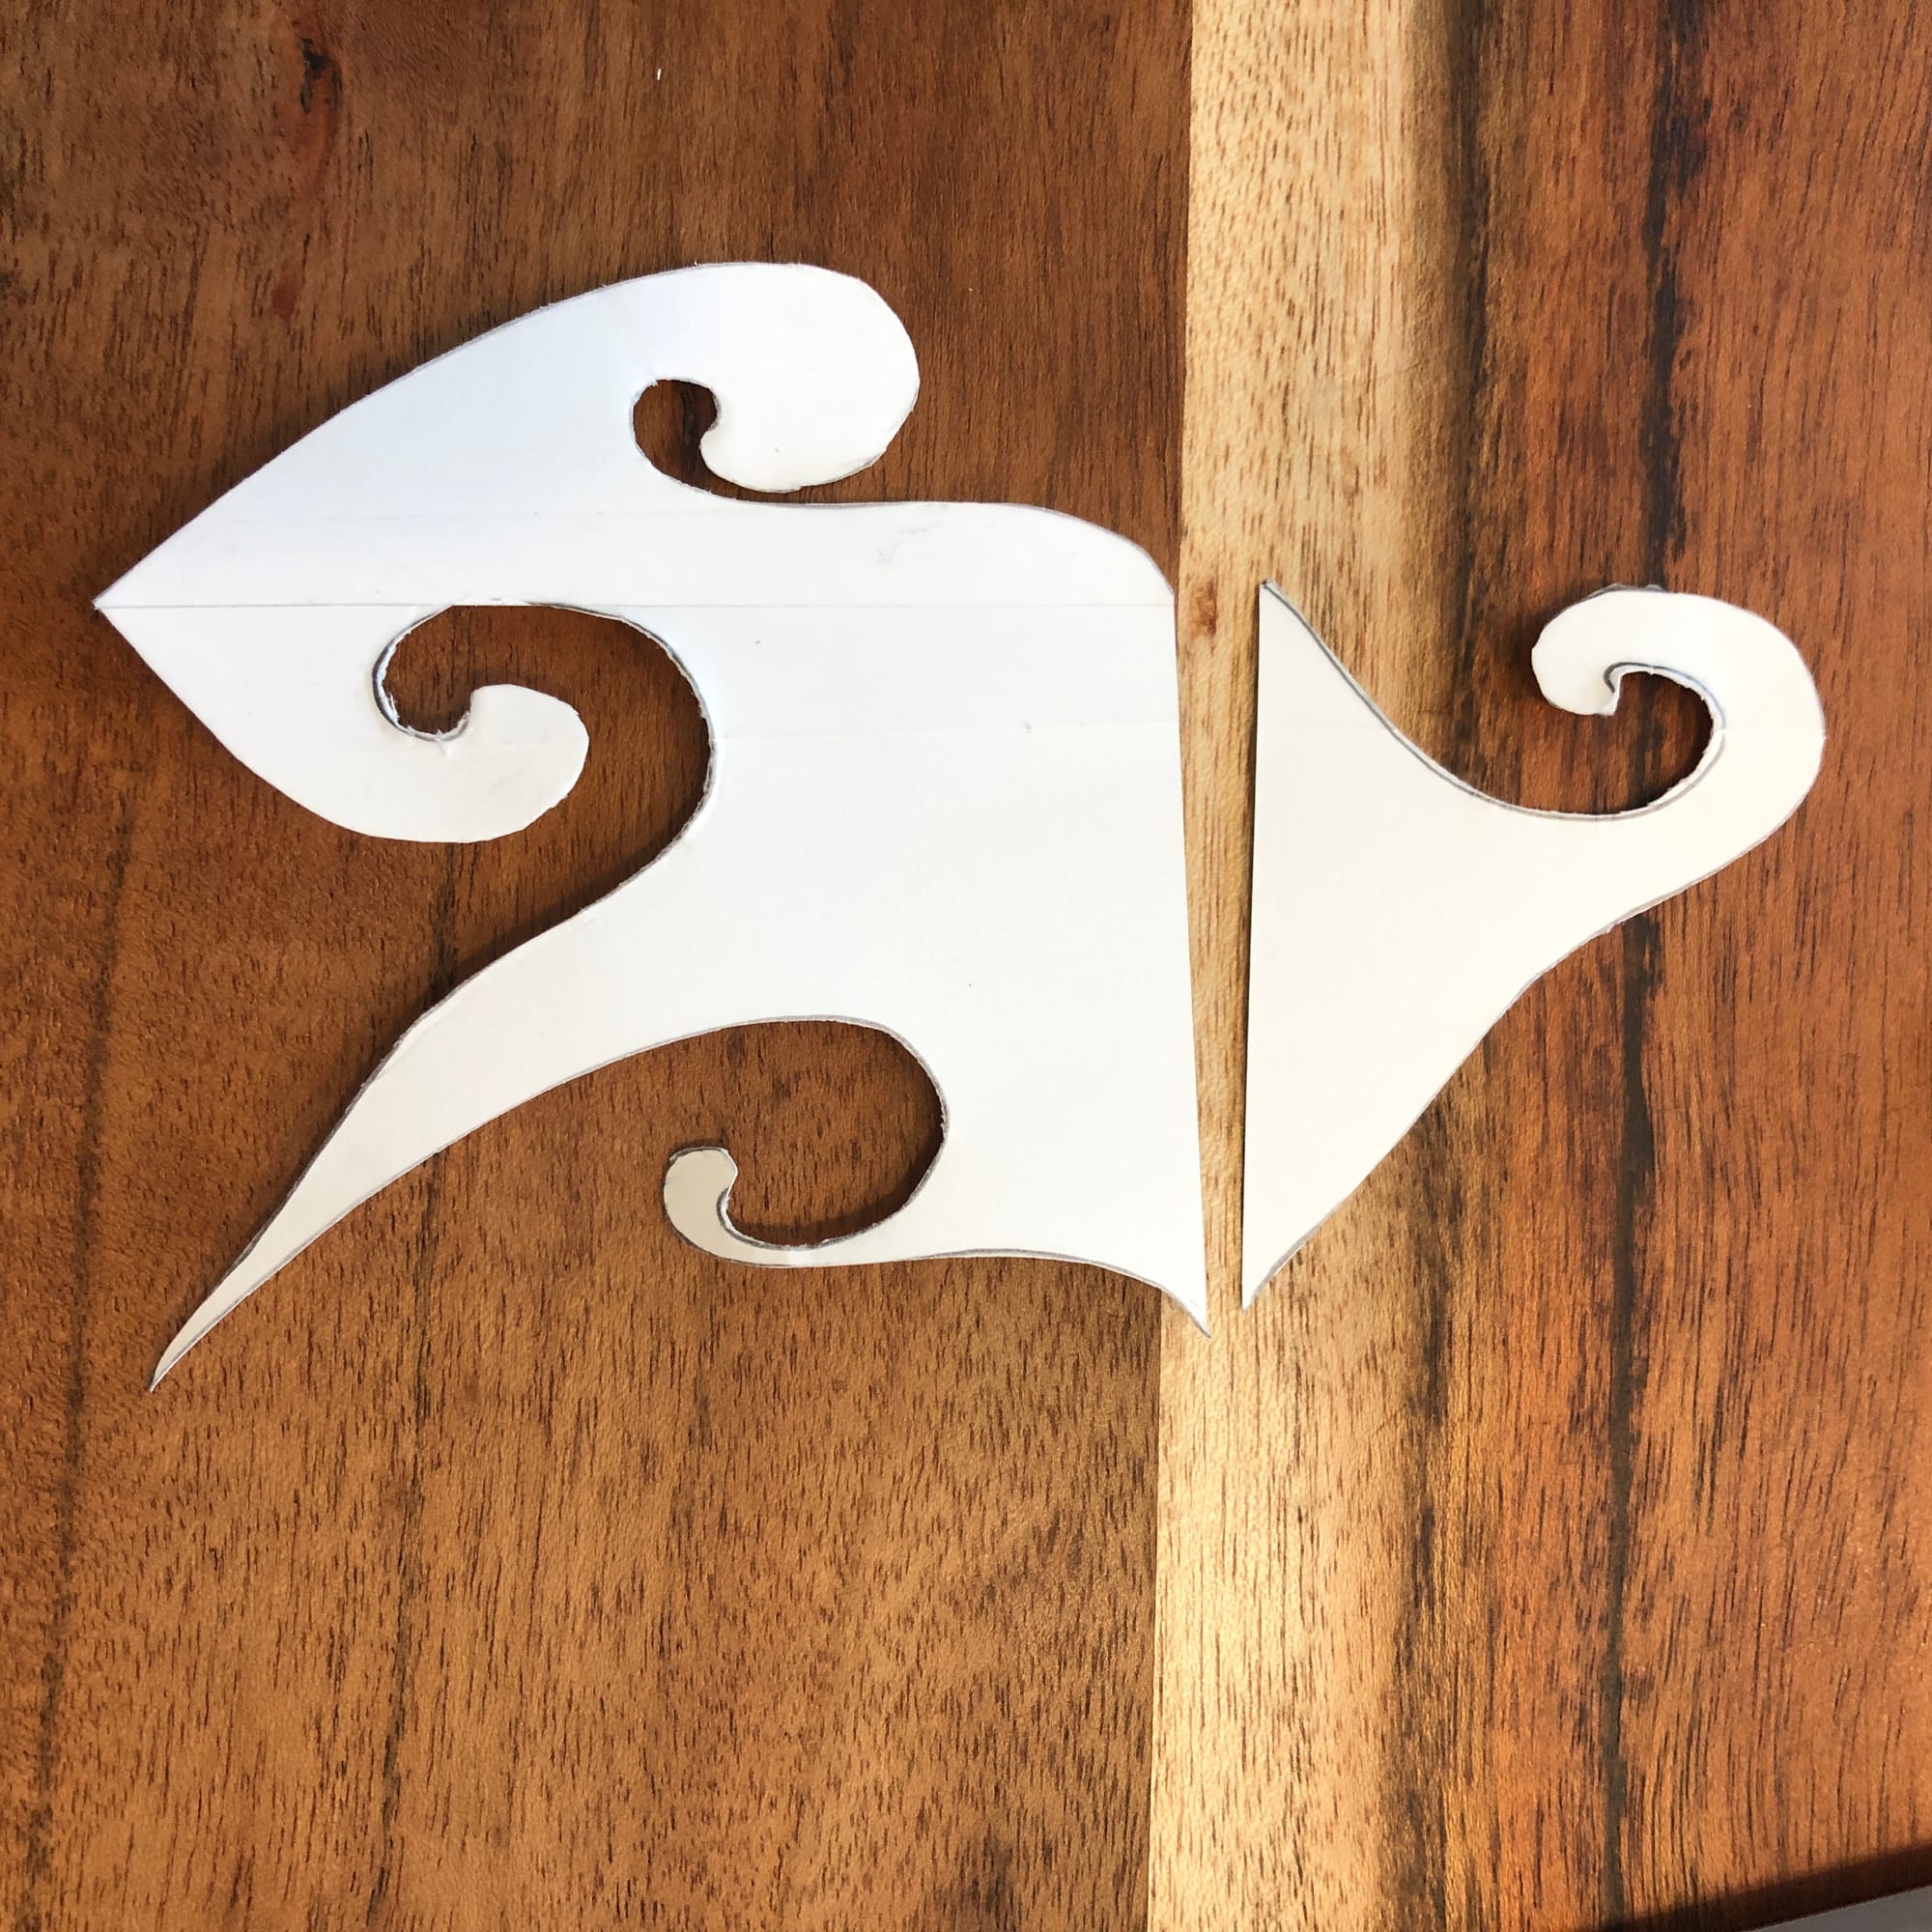
- Step 3: Sketch a curve from the top left of your rectangle to the bottom left.

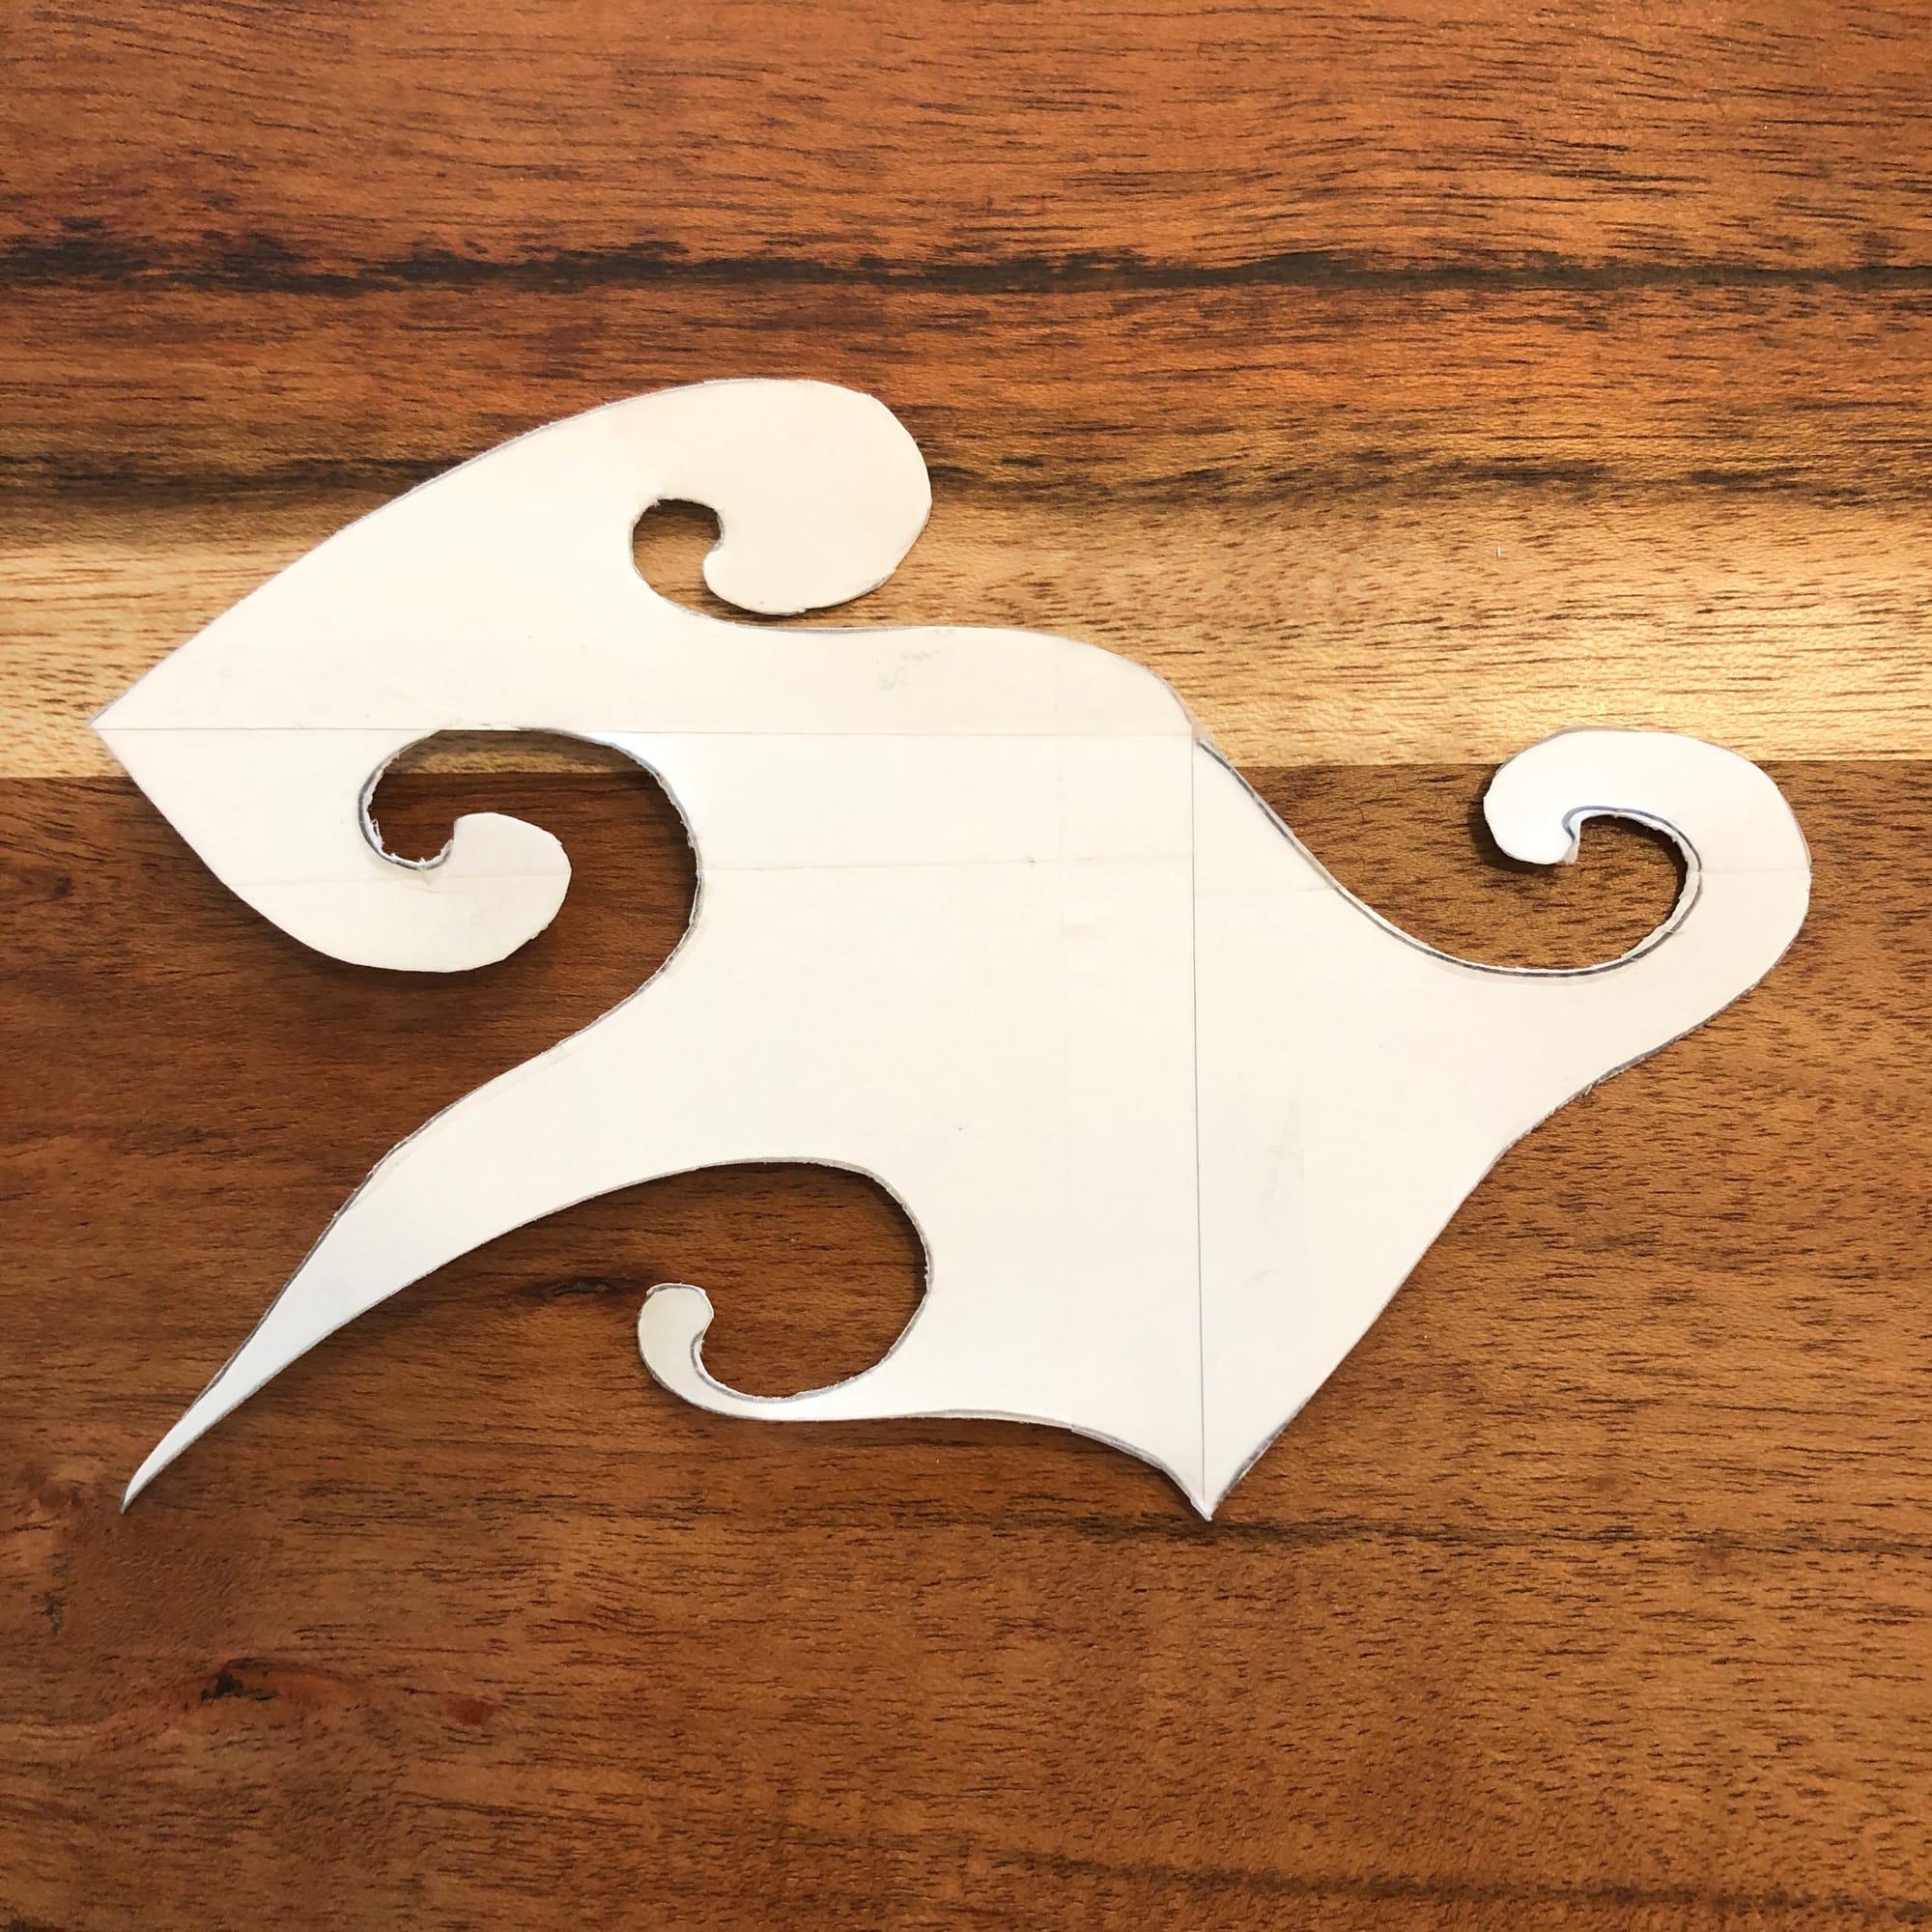
- Step 4: Cut out the curve on the left and then tape it to the opposite side (again as perfectly as you can).


- Step 5: Trace your shape on a sheet of paper and add some fun details:


